

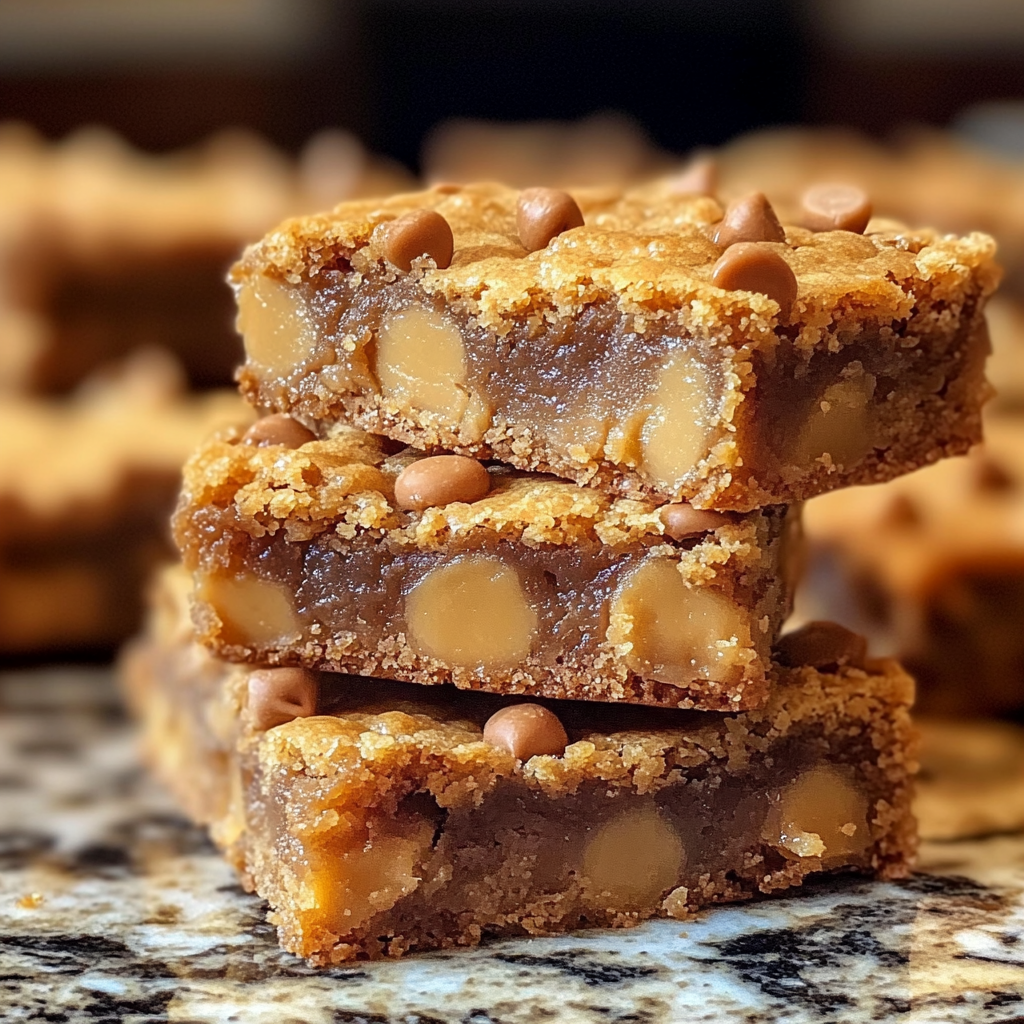
I still remember the first time I created these Butterscotch Toffee Cookie Bars. It was during a rainy weekend when my niece and I were craving something sweet but wanted to avoid the tedious process of scooping individual cookies. The heavenly aroma of butterscotch and toffee filled my kitchen, creating an atmosphere of warmth and comfort that perfectly countered the gloomy weather outside. What began as a simple experiment has since become my go-to recipe when I need something quick yet impressive. These bars strike that perfect balance of being incredibly simple to prepare while delivering gourmet-level flavor that leaves everyone asking for the recipe.
Why You’ll Love This Recipe
I’ve found these Butterscotch Toffee Cookie Bars to be absolutely irresistible for several compelling reasons:
- Simplicity at its finest: With just one bowl and a pan, these bars come together in minutes, making them perfect for last-minute gatherings or sudden sweet cravings.
- Texture perfection: The crisp, buttery edges give way to a chewy center studded with melty butterscotch chips and crunchy toffee bits – it’s a texture lover’s dream!
- Make-ahead friendly: I’ve discovered these bars actually taste even better the next day as the flavors deepen and meld together beautifully.
- Crowd-pleasing flavor: The combination of rich brown sugar, butterscotch, and toffee creates a complex caramel-like flavor that appeals to all ages.
- Foolproof results: Whether you’re a novice baker or an experienced one, this recipe delivers consistent, impressive results every single time.
Ingredients for This Recipe
- Unsalted Butter : The foundation that creates a rich, moist texture and carries flavor throughout the bars. I always use unsalted to control the salt level precisely.
- Brown Sugar : The magical ingredient that gives these bars their caramel-like flavor and chewy texture. I prefer dark brown sugar for a deeper molasses note.
- Eggs : They provide structure and richness. I always bring them to room temperature for better incorporation into the batter.
- Vanilla Extract : The aromatic that enhances all the other flavors. I use pure rather than imitation for a more authentic taste.
- All-Purpose Flour : The structural backbone of our bars. I measure using the spoon-and-level method to avoid dense, dry bars.
- Baking Powder : Provides just enough lift without making them too cakey. The perfect amount for a dense, chewy texture.
- Salt : Balances the sweetness and enhances the butterscotch flavor. Even with a sweet dessert, this small amount makes everything taste better.
- Butterscotch Chips : These melt into pockets of sweet, buttery goodness throughout the bars. I look for high-quality chips with real butter in the ingredients.
- Toffee Bits : Adding spectacular crunch and caramel flavor. I prefer the bits without chocolate coating for a purer toffee experience.
How to Make This Recipe
- Prepare the Pan: I start by preheating my oven to 350°F (175°C) and lining a 9×13-inch baking pan with parchment paper, leaving overhang on the sides for easy removal. A light spray of cooking oil ensures nothing sticks.
- Mix Wet Ingredients: In a large bowl, I combine the melted butter and brown sugar, whisking until smooth and no sugar lumps remain. The mixture should look like a glistening caramel sauce. I let it cool slightly if it’s very warm.
- Add Eggs and Vanilla: I beat in the eggs one at a time, ensuring each is fully incorporated before adding the next. Then I stir in the vanilla extract. The batter should look glossy and smooth at this point.
- Incorporate Dry Ingredients: I whisk together the flour, baking powder, and salt in a separate bowl, then gradually fold them into the wet mixture, stopping just when no dry streaks remain. Over-mixing here leads to tough bars, so I exercise restraint.
- Add Mix-ins: With a gentle hand, I fold in the butterscotch chips and toffee bits, distributing them evenly throughout the batter. The aroma at this point is absolutely heavenly – buttery and sweet with hints of caramel.
- Bake to Perfection: I spread the batter evenly in the prepared pan and bake for 25-30 minutes until the top is golden brown and a toothpick inserted in the center comes out with a few moist crumbs (not wet batter). The edges will be slightly darker and beginning to pull away from the sides.
- Cool and Cut: I allow the bars to cool completely in the pan on a wire rack before lifting them out using the parchment overhang. With a sharp knife, I cut them into squares, wiping the blade between cuts for clean edges.
Expert Cooking Tips
- Temperature matters: I always ensure my melted butter has cooled slightly before adding eggs to prevent scrambling them. The perfect temperature is warm, not hot.
- The toothpick test: I’ve found that slightly underbaking produces the best chewy texture. When my toothpick shows a few moist crumbs (not wet batter), I know they’re perfect.
- Parchment paper is non-negotiable: I learned the hard way that these sticky, sweet bars need parchment with overhang for easy removal and cleanup.
- Enhance the butterscotch flavor: I sometimes brown the butter before melting it completely, which adds a nutty dimension that complements the butterscotch beautifully.
- Perfect cutting technique: I chill the bars for 30 minutes before cutting with a sharp knife wiped clean between slices for picture-perfect squares.
Proper Storage
- Room Temperature: Store in an airtight container with parchment between layers for 3-4 days. The bars actually improve in flavor after the first day as the butterscotch deepens.
- Refrigeration: For longer freshness (up to a week), refrigerate in a sealed container. I bring them to room temperature before serving for the best chewy texture.
- Freezing: Wrap individual bars in plastic, then store in a freezer bag for up to 3 months. This method prevents freezer burn and preserves that perfect chewy texture.
- Thawing: Unwrap and thaw at room temperature for about an hour. For a freshly-baked taste, warm in a 300°F oven for 5 minutes.
Variations and Substitutions
- Chocolate Lovers’ Version: I sometimes substitute chocolate chips for butterscotch chips and add a tablespoon of cocoa powder to the flour for a chocolate-toffee combination that’s absolutely divine.
- Nutty Delight: Adding ½ cup of toasted chopped pecans or walnuts creates a wonderful textural contrast and nutty flavor that complements the butterscotch beautifully.
- Gluten-Free Option: I’ve successfully made these with a 1:1 gluten-free flour blend plus ¼ teaspoon xanthan gum if not included in the blend. The texture remains remarkably similar.
- Dairy-Free Adaptation: Plant-based butter works well here, though I reduce the amount by 2 tablespoons. For the butterscotch chips, I use dairy-free caramel chips with a pinch of salt.
- Salted Caramel Twist: Adding a light sprinkle of flaky sea salt on top before baking creates an irresistible sweet-salty balance that elevates these bars to gourmet status.
What Goes with This Recipe
- Vanilla Ice Cream: A warm bar topped with cold vanilla ice cream creates a temperature contrast that heightens the butterscotch flavor. I love watching the ice cream slowly melt into the bars.
- Coffee or Espresso: The bitter notes of a strong coffee beautifully balance the sweet, buttery richness of these bars. My perfect afternoon pick-me-up combination.
- Fresh Berries: Tart raspberries or strawberries cut through the sweetness with vibrant acidity. The color contrast also makes for a gorgeous presentation.
- Caramel Sauce: For an indulgent dessert experience, I warm these bars slightly and drizzle with homemade caramel sauce. The double caramel flavor is simply magnificent.
FAQ
Can I make these without toffee bits? Absolutely! Substitute with chocolate chips, chopped nuts, or more butterscotch chips for equally delicious results.
Why did my bars turn out cakey? You likely used too much flour or overmixed the batter. Remember to spoon and level flour and mix just until combined.
Can I double this recipe? Yes! Use a larger pan or two 9×13 pans and watch the baking time carefully.
How do I know when they’re done? Edges should be set and golden, center slightly soft. A toothpick should show a few moist crumbs, not wet batter.
Can I reduce the sugar? I wouldn’t recommend reducing by more than ¼ cup as it affects texture and moisture, not just sweetness.
PrintButterscotch Toffee Cookie Bars

Indulge in my irresistible Butterscotch Toffee Cookie Bars – chewy, buttery treats loaded with butterscotch chips and toffee bits that come together in minutes. Perfect for potlucks, bake sales, or satisfying sweet cravings!
- Prep Time: 15 minutes
- Cook Time: 30 minutes
- Total Time: 45 minutes
- Yield: 24 bars
Ingredients
- 1 cup unsalted butter, melted
- 1½ cups brown sugar
- 2 large eggs
- 2 teaspoons vanilla extract
- 2 cups all-purpose flour
- 1 teaspoon baking powder
- ½ teaspoon salt
- 1 cup butterscotch chips
- ¾ cup toffee bits
Instructions
- Preheat oven to 350°F. Line 9×13-inch pan with parchment.
- Whisk melted butter and brown sugar until smooth.
- Beat in eggs one at a time, then vanilla.
- Fold in flour, baking powder, and salt until just combined.
- Gently stir in butterscotch chips and toffee bits.
- Spread in pan and bake 25-30 minutes until golden and set at edges.
- Cool completely before cutting into squares.
