

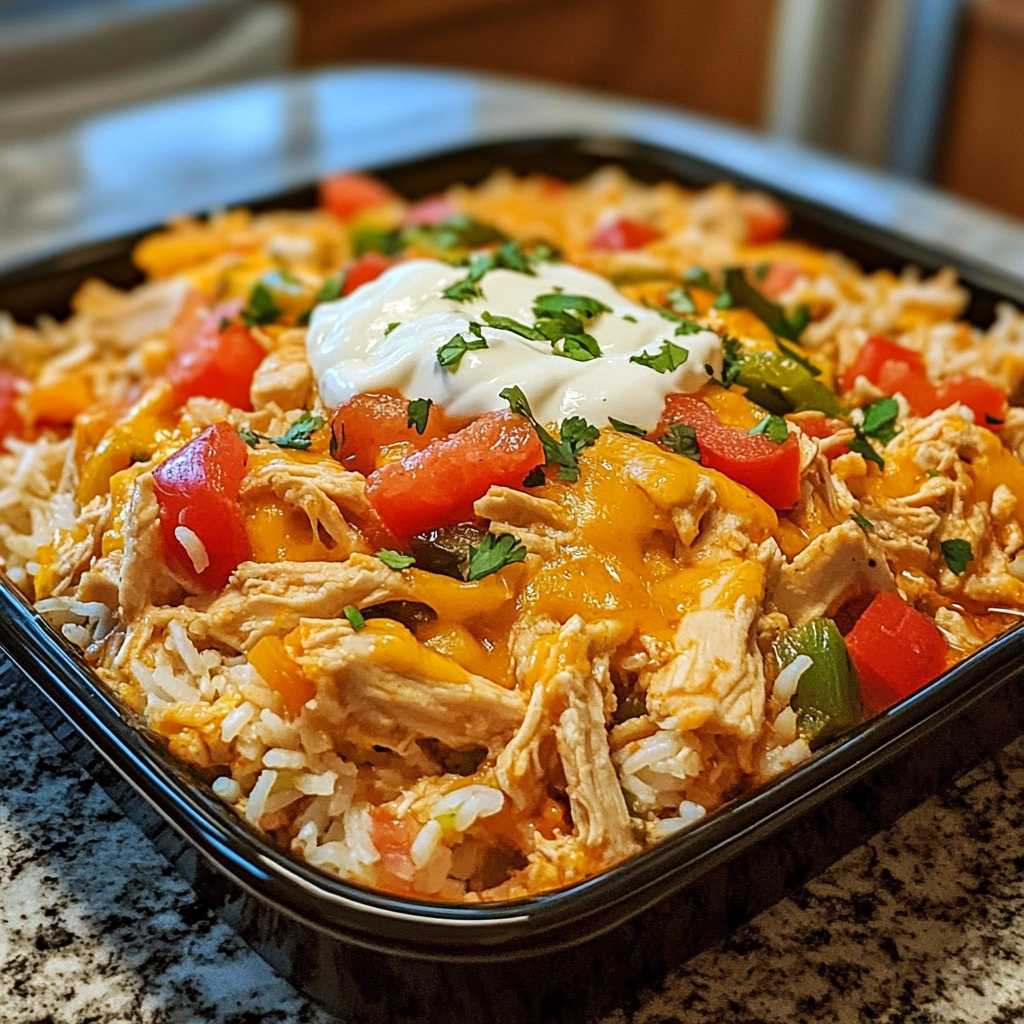
I’ve discovered that Fajita Chicken Casserole is not just a meal, but a warm embrace of Tex-Mex comfort that transforms my dinner table into a fiesta of flavors. The aroma of sizzling spices mingling with melted cheese creates an irresistible symphony that fills my kitchen. Ever had one of those exhausting days when you crave something satisfying but don’t want to spend hours cooking? This casserole has become my answer to that eternal question. What makes it feel so special to me is how it takes the vibrant, bold flavors of fajitas and transforms them into a hearty, soul-warming dish that’s both indulgent yet surprisingly simple. It’s become my secret weapon for impressing weekend guests, but honestly, I find myself making it on random Tuesdays just because we all deserve a little celebration on an ordinary day.
Why You’ll Love This Recipe
The magic of this Fajita Chicken Casserole:
- Perfect balance of convenience and complexity
- Rich, velvety sauce from fajita seasoning and cream of chicken soup
- Instant rice cooks directly in the mixture, absorbing flavors
- Saves time without sacrificing flavor
- Foolproof method for novice and experienced cooks
- Tastes like it’s been simmering all day
Ingredients for This Recipe
- Shredded Cooked Chicken : The foundation of our casserole that provides hearty protein. I prefer rotisserie chicken for its convenience and depth of flavor, though home-cooked breasts work beautifully too.
- Instant Rice : The magical time-saver that cooks directly in our flavorful liquid mixture. I’ve found it absorbs the surrounding flavors better than pre-cooked rice ever could.
- Cream of Chicken Soup : This provides the creamy backbone that binds everything together. I select a high-quality brand for richness and flavor; homemade elevates the dish further.
- Sour Cream : Adds a luxurious tanginess that balances the spicy elements. I always use full-fat for the creamiest texture, though light works in a pinch.
- Frozen Onion and Bell Pepper Blend : The convenience hero that delivers fresh vegetable flavor without chopping. I love the sweet notes these bring when they roast in the casserole.
- Diced Tomatoes with Chilies : This provides instant depth and Tex-Mex character. The heat level varies by brand, so I choose based on my family’s spice tolerance.
- Chicken Broth : Creates the perfect moisture level for cooking the rice while infusing everything with savory flavor. I always use low-sodium to control the overall saltiness.
- Fajita Seasoning : The flavor powerhouse that transforms ordinary ingredients into something extraordinary. This spice blend defines the dish’s exotic flavor, so choose one that resonates with your palate.
- Mexican Blend Cheese : Creates that irresistible golden, bubbly top that makes everyone eager to dig in. I prefer freshly shredded for superior melting qualities.
How to Make This Recipe
- Preheat Your Oven: I always start by setting my oven to 350°F (175°C) and lightly greasing a 9×13-inch baking dish. This ensures even cooking and prevents sticking.
- Create the Creamy Base: In a large mixing bowl, I combine the cream of chicken soup, sour cream, undrained tomatoes with chilies, and fajita seasoning. I whisk until smooth, watching as the spices blend into a fragrant, speckled mixture.
- Add the Liquid Elements: Next, I pour in the chicken broth and stir until everything is fully incorporated. This liquid balance is crucial – it needs to be enough to cook the rice to tender perfection.
- Incorporate the Main Components: I fold in the shredded chicken, instant rice, and frozen pepper-onion blend. Each gentle turn of my spatula distributes the ingredients evenly, ensuring consistent flavor in every bite.
- Transfer and Top with Cheese: After pouring the mixture into my prepared baking dish, I spread it evenly to the corners. Then comes my favorite part – blanketing the entire surface with shredded Mexican cheese blend until not a speck of filling peeks through.
- Bake to Bubbly Perfection: I cover the dish with foil and bake for 30 minutes. Then, I remove the foil and continue baking for another 10-15 minutes until the cheese turns gloriously golden and the edges bubble with excitement.
- Rest Before Serving: The hardest part is letting it rest for 5-10 minutes after removing from the oven. This allows the flavors to settle and the texture to reach that perfect scoop-able consistency.
Expert Cooking Tips
- Toast the Rice First: I sometimes sauté the dry instant rice in a tablespoon of butter before adding it to the mixture. This quick step adds a nutty dimension that elevates the entire dish.
- Control the Heat Level: I’ve learned to adjust the spiciness by either using mild tomatoes with chilies or adding a dash of hot sauce to the mixture. This adaptability makes it perfect for any palate.
- Chicken Preparation Matters: For the juiciest result, I never overcook my chicken before shredding. Slightly undercooking boneless breasts ensures they remain tender after baking in the casserole.
- Layer for Impact: Creating distinct layers – mixture, then a cheese mid-layer, then more mixture and final cheese topping – has been my secret to ensuring cheese in every forkful.
- Fresh Finish: I love adding a handful of fresh cilantro, diced avocado, or a dollop of lime-spiked sour cream after baking. These bright finishers cut through the richness beautifully.
Proper Storage
- Refrigerator Storage: Cool completely before covering with plastic wrap or transferring to airtight containers. Lasts 3-4 days when properly refrigerated. The flavors often deepen overnight!
- Freezer Method: Portion into freezer-safe containers and freeze up to 2 months. I label with the date and reheating instructions for future convenience.
- Thawing Technique: For best texture, thaw overnight in the refrigerator rather than using a microwave defrost function. This prevents the rice from becoming mushy.
- Reheating Strategy: Cover with foil and warm in a 325°F oven until heated through (about 20 minutes). Add a tablespoon of broth if it seems dry before reheating.
- Freshness Indicators: Trust your senses – if it smells off or shows any signs of spoilage, it’s better to discard. Safety first, always!
Variations and Substitutions
- Make it Vegetarian: I’ve successfully replaced chicken with black beans and corn for a hearty meatless version that maintains the protein content and satisfying texture.
- Dairy-Free Adaptation: Coconut cream can substitute for sour cream, and dairy-free cheese alternatives work surprisingly well. The subtle coconut flavor adds an interesting tropical note.
- Grain Alternatives: Cauliflower rice works for a low-carb option, though I reduce the liquid by half. Quinoa is another excellent substitute that adds nutritional value and a pleasant texture.
- Spice Profile Variations: Sometimes I swap the fajita seasoning for taco seasoning or a homemade blend of chili powder, cumin, and garlic powder for a different flavor direction.
- Protein Twist: Ground beef or turkey can replace chicken entirely. I brown it with the pepper-onion mix before adding to create additional flavor through caramelization.
What Goes with This Recipe
- Fresh Cilantro-Lime Salad: Crisp romaine with cilantro, cherry tomatoes, and lime dressing provides refreshing contrast to the rich casserole. The citrus brightens each bite.
- Warm Corn Tortillas: Serve alongside for scooping or wrapping portions of the casserole. Their subtle sweetness and soft texture complement the creamy, spiced filling perfectly.
- Mexican Street Corn: The sweet kernels and tangy, spiced coating echo the Tex-Mex flavors while adding textural variety. The char adds wonderful smoky notes.
- Cucumber-Avocado Salsa: Cool, creamy avocado chunks with crisp cucumber and red onion balance the casserole’s warmth. The contrasting temperature and texture enhance the meal.
- Simple Black Beans: Seasoned with cumin and lime, they extend the protein content while adding earthy depth. Their subtle flavor supports without competing.
FAQ
Can I prepare this ahead of time? Absolutely! Assemble up to 24 hours ahead, refrigerate, and add 10-15 minutes to the baking time.
Is there a way to make this spicier? Add diced jalapeños or a teaspoon of chipotle powder to the mixture before baking.
Can I use regular rice instead of instant? Regular rice requires pre-cooking or significantly more liquid and longer baking time. Instant works best here.
How do I prevent the casserole from becoming dry? Don’t overbake, and make sure your foil seal is tight during the first baking phase.
Can I add more vegetables? Definitely! Corn, black beans, or diced zucchini work wonderfully. Adjust liquid slightly if adding water-releasing vegetables.
PrintFajita Chicken Casserole

Transform your dinner routine with my Fajita Chicken Casserole – a creamy, cheesy one-dish wonder packed with Tex-Mex flavors that comes together in minutes but tastes like you spent hours in the kitchen!
- Prep Time: 15 minutes
- Cook Time: 45 minutes
- Total Time: 1 hour
- Yield: 8 servings
Ingredients
- 4 cups shredded cooked chicken (about 3 large breasts)
- 2 cups instant rice
- 1 can (10.5 oz) cream of chicken soup
- 1 cup sour cream
- 1 cup frozen diced onion and bell pepper blend
- 1 can (10 oz) diced tomatoes with chilies, undrained
- 1 1/2 cups chicken broth
- 1 packet (1.12 oz) fajita seasoning
- 1 bag (8 oz) shredded Mexican blend cheese (about 2 cups)
Instructions
- Preheat oven to 350°F. Lightly grease a 9×13-inch baking dish.
- In a large bowl, combine soup, sour cream, tomatoes with chilies, and fajita seasoning.
- Stir in chicken broth until well mixed.
- Fold in chicken, rice, and pepper-onion blend.
- Transfer to prepared baking dish and top with cheese.
- Cover with foil and bake for 30 minutes.
- Remove foil and bake 10-15 minutes more until cheese is golden and edges bubble.
- Let rest 5-10 minutes before serving.
