

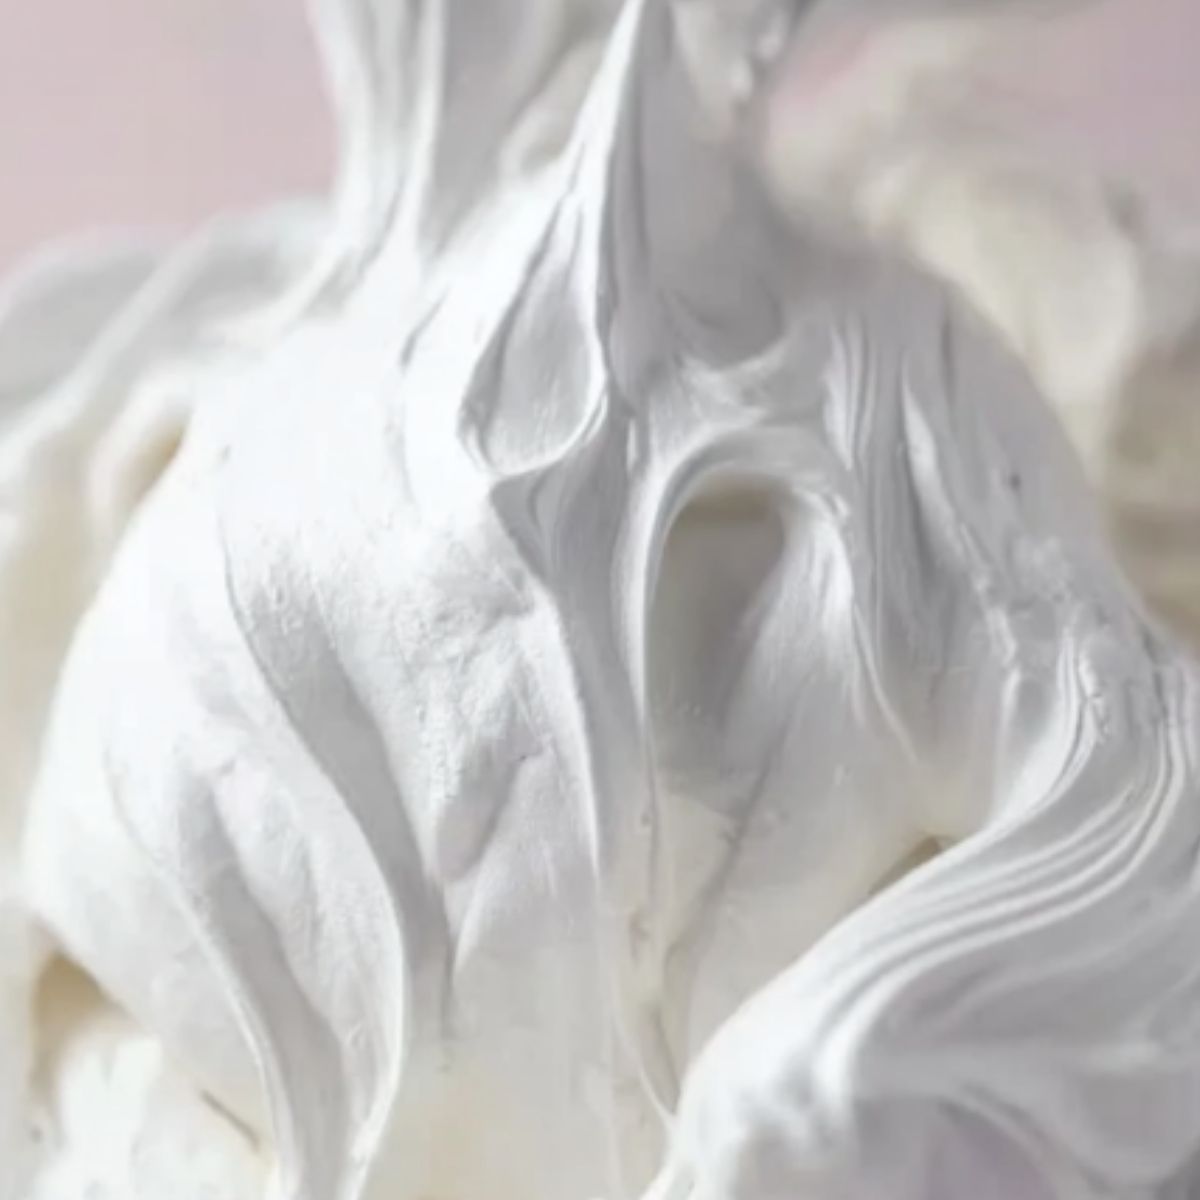
There’s something magical about homemade marshmallow creme that takes me back to winter afternoons in my grandmother’s kitchen. I was about eight years old when I first watched her whip up this cloud-like confection, my eyes wide with wonder as the sticky mixture transformed into billowy white peaks that seemed to defy gravity.
It wasn’t until years later, during a particularly nostalgic holiday season in my tiny first apartment, that I attempted to recreate her recipe. After three somewhat disastrous attempts (one that nearly cemented my hand mixer into a sugary tomb), I finally achieved that perfect fluffy texture that had seemed so effortless when Grandma made it.
What Makes Fluffy Marshmallow Creme Special
I’ve discovered what truly elevates this Fluffy Marshmallow Creme from ordinary to extraordinary:
- The perfect balance of science and simplicity is at work here – the cream of tartar stabilizes the egg whites at a molecular level, creating a structure that holds air bubbles perfectly while the hot sugar syrup cooks the proteins, resulting in that signature marshmallow stability that store-bought versions can’t match.
- I’ve found the corn syrup works magic by preventing crystallization, giving you that silky-smooth texture without the graininess that often plagues homemade candy recipes.
- What makes me proudest is how versatile this recipe is – I use it warm as a decadent fondue for strawberries, chilled as the filling for macarons, or at room temperature folded into homemade ice cream for the ultimate rocky road.
- The vanilla extract isn’t just for flavor – I’ve discovered it contains compounds that enhance the perception of sweetness, meaning you actually taste more complexity while using less sugar than commercial versions.
- I love that this recipe bridges the gap between beginner-friendly and professional-quality results – the technique is forgiving enough for first-timers but creates a product that even pastry chefs would proudly serve.
Ingredients Notes
- Granulated Sugar: I always use pure cane sugar for its clean sweetness. It forms the backbone of the creme, creating that signature marshmallow structure when heated to soft-ball stage. Superfine dissolves quicker if you’re in a hurry.
- Light Corn Syrup: I’ve learned corn syrup is non-negotiable here—it prevents crystallization and creates that glossy sheen. I prefer light over dark for its neutral flavor that lets the vanilla shine through.
- Water: I exclusively use filtered water. Tap water’s minerals can affect both flavor and how the sugar crystallizes. Room temperature water helps the sugar dissolve more uniformly when heating begins.
- Egg Whites: I always choose room-temperature, farm-fresh eggs for superior whipping volume. The proteins in whites create the miraculous structure that traps air. Separate them carefully—even a speck of yolk will compromise your whip because the fat in yolks inhibits foam formation and stability.
- Cream of Tartar: I consider this my secret weapon. This acidic powder stabilizes the egg whites, preventing them from collapsing when the hot syrup is added. I store mine in a dark, dry place to maintain potency.
- Vanilla Extract: I splurge on Madagascar bourbon vanilla for its complex, floral notes. The extract’s alcohol evaporates during mixing, leaving behind intense flavor compounds (aromatic aldehydes and esters) that balance the pure sweetness perfectly.
How to Make Fluffy Marshmallow Creme
Preparation
- Set up your workspace: I always arrange two stations—one for the syrup and one for the egg whites. Place your candy thermometer, stand mixer (or hand mixer with a large bowl), measuring cups, and spatulas within easy reach.
- Prepare your storage containers: Sterilize glass jars by washing thoroughly with hot, soapy water and drying completely. Any moisture will shorten the shelf life of your marshmallow creme.
Cooking the Sugar Syrup
- Combine the dry and wet: In a medium heavy-bottomed saucepan (I prefer stainless steel), combine the granulated sugar, light corn syrup, and water. Stir gently with a silicone spatula just until mixed—overstirring can cause crystallization.
- Heat carefully: Place the saucepan over medium heat and attach your candy thermometer to the side, ensuring it doesn’t touch the bottom of the pan. Allow the mixture to come to a boil without stirring.
- Monitor temperature precisely: Continue boiling until the syrup reaches exactly 240°F (soft-ball stage). This typically takes 10-12 minutes. For beginners: keep a small bowl of ice water nearby—a drop of syrup should form a soft, pliable ball when dropped in.
Preparing the Egg Whites
- Begin whipping: When your syrup reaches about 225°F, start whipping the room temperature egg whites in your stand mixer with the whisk attachment on medium speed. Timing tip: Synchronizing these steps ensures your whites are perfectly whipped when the syrup is ready and at peak softness to receive the syrup.
- Add stability: Once the egg whites become frothy (about 1 minute), add the cream of tartar. This acidic ingredient stabilizes the protein structure of the whites, preventing collapse when the hot syrup is added.
- Achieve soft peaks: Increase mixer speed to medium-high and continue whipping until soft peaks form—when you lift the whisk, the whites should create gentle peaks that slightly fold over at the tips.
Combining & Finishing
- Pour with precision: With the mixer running on medium speed, slowly pour the 240°F sugar syrup into the egg whites in a thin, steady stream, aiming for the space between the whisk and the bowl’s edge. Caution: Pour too quickly and you’ll cook the eggs; too slowly and the syrup may harden. If you hit the whisk directly, the syrup may fling and splatter dangerously.
- Increase intensity: Once all the syrup is incorporated, increase the mixer speed to high. The mixture will begin to thicken and turn glossy white.
- Add flavor: After about 5 minutes of whipping, add the vanilla extract. For advanced bakers: Consider substituting other extracts like almond or peppermint for variation.
- Achieve perfection: Continue whipping on high speed for 5-7 more minutes until the mixture has tripled in volume, cooled significantly, and holds stiff, glossy peaks. It should be thick enough that a spatula drawn through leaves a clear path that slowly fills in. The mixture should no longer feel warm to the touch at this stage.
Storage & Troubleshooting
- Transfer with care: Using a silicone spatula (sprayed lightly with cooking spray to prevent sticking), transfer the marshmallow creme to your prepared containers. For gift jars, use a piping bag for a cleaner presentation.
- Storage wisdom: Store in airtight containers at room temperature for up to 2 weeks, or refrigerated for up to 1 month. If separation occurs after storage, simply whip again for 1-2 minutes before using. For more detailed preservation techniques, see the Storage Tips section below.
- Consistency adjustment: If your creme is too stiff, incorporate 1-2 teaspoons of hot water while whipping. If too loose, continue whipping for another 2-3 minutes.
Top 5 Pro Techniques for Foolproof Marshmallow Creme
- I never rush the syrup stage. For crystal-clear marshmallow creme, brush down sugar crystals from the pan sides with a wet pastry brush during the first few minutes of boiling.
- Room temperature egg whites whip to nearly triple the volume of cold ones. I set mine out for 30 minutes before starting, or place them in a bowl of warm water for 5 minutes.
- The syrup-to-whites pouring technique is crucial. I use a heat-resistant silicone spatula to guide the stream between the bowl and whisk, preventing hardened sugar splatter on the sides.
- When whipping the final mixture, I look for the “ribbon test” – when lifted, the marshmallow should fall back into the bowl in a thick ribbon that holds its shape for several seconds before disappearing.
- I find a light coating of neutral oil on my measuring tools prevents sticking. For storage containers, a quick spritz of cooking spray before filling means every last bit of marshmallow creme slides out easily when needed.
Storage Tips for Fluffy Marshmallow Creme
- Choose proper containers: I always use glass jars with tight-fitting lids rather than plastic. The non-porous surface prevents moisture absorption and maintains that perfect fluffy texture for weeks longer.
- Room temperature storage: For daily use, I keep marshmallow creme at room temperature (65-75°F) in a dark pantry for up to 2 weeks. Avoid direct sunlight or warm spots that can cause separation.
- Refrigeration technique: When refrigerating for extended storage (up to 1 month), I place parchment paper directly on the surface before sealing to prevent condensation from dripping back and creating a wet layer.
- Freezer preservation: I’ve successfully frozen marshmallow creme in airtight containers for up to 3 months. The key is thawing completely at room temperature (about 4 hours) before gently rewhipping for 2-3 minutes.
- Revival method: If your creme develops a slight crust or separates, I simply transfer it to a stand mixer with 1 tablespoon of hot water and whip on medium-high for 2 minutes until restored to its original glory.
- Contamination prevention: I always use clean, dry utensils when scooping from the storage container. A dedicated marshmallow creme spoon prevents introducing moisture or food particles that could cause spoilage.
Variations and Substitutions for Fluffy Marshmallow Creme
- Flavor Infusions: Replace vanilla extract with equal amounts of almond, mint, or coffee extract. For citrus varieties, I add 1 teaspoon of fresh zest during the final minute of whipping to preserve the bright oils.
- Honey Marshmallow: Substitute up to 1 cup of the granulated sugar with honey for a more complex flavor profile. I reduce the water by 2 tablespoons since honey contains moisture and lower the cooking temperature to 238°F.
- Color Variations: Add 2-3 drops of gel food coloring (never liquid) during the final whipping stage. I create stunning swirls by dividing the batch and folding colored portions together gently at the end.
- Chocolate Marshmallow: Sift 3 tablespoons of high-quality cocoa powder over the mixture during the last minute of whipping. I find Dutch-processed creates a richer flavor than natural cocoa powder.
- Vegan Option: Replace egg whites with 3/4 cup aquafaba (chickpea liquid) reduced by simmering to 1/2 cup. I increase cream of tartar to 3/4 teaspoon for proper stabilization.
- Bourbon Vanilla: Add 1 tablespoon bourbon along with the vanilla extract for sophisticated depth. The alcohol evaporates during whipping, leaving just the caramel notes that complement the marshmallow beautifully.
- Fruit-Infused: Fold in 2-3 tablespoons of freeze-dried fruit powder (strawberry, raspberry, blueberry) after whipping. I pulse the freeze-dried fruit in a spice grinder for the finest texture.
- Corn Syrup Alternative: Substitute light corn syrup with an equal amount of golden syrup or glucose syrup. I avoid honey alone as it can overpower, but a 50/50 blend works wonderfully.
- Salt-Kissed: Add 1/4 teaspoon of flaky sea salt during the final whip for a sophisticated sweet-salty balance that enhances the vanilla notes and cuts through the sweetness.
What to Serve with Fluffy Marshmallow Creme
Sweet Pairings
- Dark Chocolate Dipped Strawberries: The bittersweet chocolate and tart berries cut through the marshmallow’s sweetness. I serve these with a small pot of warmed creme for an elegant dessert that balances acidity, bitterness, and sweetness.
- Homemade Graham Crackers: The nutty, whole grain flavor and subtle honey notes in graham crackers provide the perfect textural contrast. I toast mine lightly to enhance their warm spices against the vanilla-forward creme.
- Brownie Bites: Rich, fudgy brownies topped with a dollop of marshmallow creme create an elevated s’mores experience. The dense chocolate base anchors the airy marshmallow topping in perfect textural harmony.
Beverage Companions
- Espresso: The bitter intensity of a well-pulled espresso shot balances the pure sweetness of marshmallow creme. I serve small espresso cups with marshmallow creme “clouds” that slowly melt into the coffee.
- Spiced Hot Chocolate: The warming spices (cinnamon, cayenne) in hot chocolate create depth against the vanilla-forward marshmallow. I float a generous spoonful on top for a luxurious melt-in experience.
Creative Applications
- Toasted Brioche: Lightly buttered and toasted brioche creates a sophisticated base for marshmallow creme. The rich, eggy bread provides the ideal neutral canvas while adding a delicate crunch.
- Fresh Berry Platter: Arrange seasonal berries around a central bowl of marshmallow creme for an interactive dessert. The natural acidity in berries cuts through sweetness while adding vibrant color contrast.
- Salted Shortbread Cookies: The buttery, crumbly texture and hint of salt in shortbread perfectly complements marshmallow creme’s pillowy sweetness. I sandwich them together for an elegant after-dinner treat.
Frequently Asked Questions: Fluffy Marshmallow Creme
Basic Questions
Q: Can I make marshmallow creme without a candy thermometer? A: Yes! Use the ice water test—when syrup forms a soft, pliable ball that flattens when removed, it’s ready.
Q: Is corn syrup absolutely necessary? A: Yes. It prevents crystallization and creates that signature smooth texture. Glucose syrup can substitute in equal amounts.
Q: My marshmallow creme deflated. What happened? A: Either the syrup wasn’t hot enough (240°F minimum) or it was added too quickly, cooking the egg whites prematurely.
Technique Questions
Q: Why did my mixture turn grainy? A: Sugar crystallized. Next time, avoid stirring after boiling begins and brush down pan sides with wet pastry brush.
Q: How do I know when it’s properly whipped? A: It should hold stiff peaks and leave a ribbon trail when drizzled that takes 5-10 seconds to disappear.
Q: Can I overbeat the mixture? A: Yes. Stop when it’s glossy with stiff peaks. Overbeating causes dryness and a foam-like texture that’s less creamy.
Ingredient Questions
Q: Can I use pasteurized egg whites from a carton? A: Yes, though fresh whites whip better. Carton whites work but may require longer whipping time.
Q: Can I reduce the sugar? A: No. Sugar isn’t just for sweetness—it’s structural. Reducing it will compromise texture and stability since it’s essential to the marshmallow structure.
Q: What if I don’t have cream of tartar? A: Substitute with equal amount of lemon juice or white vinegar. It’s acidic stabilization that’s needed.
Storage & Usage
Q: Why did my stored marshmallow creme separate? A: Normal with homemade versions. Simply rewhip for 1-2 minutes with a hand mixer before using.
Q: How can I make this recipe vegan? A: Replace egg whites with reduced aquafaba (chickpea liquid). See the Vegan Option in the Variations section above for exact steps.
Q: Can I use this to make rice krispie treats? A: Absolutely! Use 2 cups of homemade creme to replace 10oz of store-bought marshmallows in standard recipes.
Troubleshooting
Q: My creme is too stiff. How can I fix it? A: Gently reheat over double boiler, stirring constantly, or whip in 1-2 teaspoons hot water.
Q: Why did my syrup harden before I could mix it with egg whites? A: Temperature was too high or pouring too slow. Reheat gently in microwave at 50% power until pourable.
Q: My creme won’t hold its shape. Help? A: Either underwhipped or syrup wasn’t hot enough. Continue whipping or use as delicious sauce instead.
PrintFluffy Marshmallow Creme

Discover how to make cloud-like Fluffy Marshmallow Creme at home in just 35 minutes. Silkier than store-bought with endless dessert possibilities—perfect for s’mores and hot chocolate!
- Prep Time: 10 minutes
- Cook Time: 25 minutes
- Total Time: 35 minutes
- Yield: 3½ cups
Ingredients
- 3 cups granulated sugar
- 1 cup light corn syrup
- 3/4 cup water
- 3 large egg whites
- 1/2 teaspoon cream of tartar
- 1 tablespoon vanilla extract
Instructions
Preparation
- Set up your workspace: I always arrange two stations—one for the syrup and one for the egg whites. Place your candy thermometer, stand mixer (or hand mixer with a large bowl), measuring cups, and spatulas within easy reach.
- Prepare your storage containers: Sterilize glass jars by washing thoroughly with hot, soapy water and drying completely. Any moisture will shorten the shelf life of your marshmallow creme.
Cooking the Sugar Syrup
- Combine the dry and wet: In a medium heavy-bottomed saucepan (I prefer stainless steel), combine the granulated sugar, light corn syrup, and water. Stir gently with a silicone spatula just until mixed—overstirring can cause crystallization.
- Heat carefully: Place the saucepan over medium heat and attach your candy thermometer to the side, ensuring it doesn’t touch the bottom of the pan. Allow the mixture to come to a boil without stirring.
- Monitor temperature precisely: Continue boiling until the syrup reaches exactly 240°F (soft-ball stage). This typically takes 10-12 minutes. For beginners: keep a small bowl of ice water nearby—a drop of syrup should form a soft, pliable ball when dropped in.
Preparing the Egg Whites
- Begin whipping: When your syrup reaches about 225°F, start whipping the room temperature egg whites in your stand mixer with the whisk attachment on medium speed. Timing tip: Synchronizing these steps ensures your whites are perfectly whipped when the syrup is ready and at peak softness to receive the syrup.
- Add stability: Once the egg whites become frothy (about 1 minute), add the cream of tartar. This acidic ingredient stabilizes the protein structure of the whites, preventing collapse when the hot syrup is added.
- Achieve soft peaks: Increase mixer speed to medium-high and continue whipping until soft peaks form—when you lift the whisk, the whites should create gentle peaks that slightly fold over at the tips.
Combining & Finishing
- Pour with precision: With the mixer running on medium speed, slowly pour the 240°F sugar syrup into the egg whites in a thin, steady stream, aiming for the space between the whisk and the bowl’s edge. Caution: Pour too quickly and you’ll cook the eggs; too slowly and the syrup may harden. If you hit the whisk directly, the syrup may fling and splatter dangerously.
- Increase intensity: Once all the syrup is incorporated, increase the mixer speed to high. The mixture will begin to thicken and turn glossy white.
- Add flavor: After about 5 minutes of whipping, add the vanilla extract. For advanced bakers: Consider substituting other extracts like almond or peppermint for variation.
- Achieve perfection: Continue whipping on high speed for 5-7 more minutes until the mixture has tripled in volume, cooled significantly, and holds stiff, glossy peaks. It should be thick enough that a spatula drawn through leaves a clear path that slowly fills in. The mixture should no longer feel warm to the touch at this stage.
Storage & Troubleshooting
- Transfer with care: Using a silicone spatula (sprayed lightly with cooking spray to prevent sticking), transfer the marshmallow creme to your prepared containers. For gift jars, use a piping bag for a cleaner presentation.
- Storage wisdom: Store in airtight containers at room temperature for up to 2 weeks, or refrigerated for up to 1 month. If separation occurs after storage, simply whip again for 1-2 minutes before using. For more detailed preservation techniques, see the Storage Tips section below.
- Consistency adjustment: If your creme is too stiff, incorporate 1-2 teaspoons of hot water while whipping. If too loose, continue whipping for another 2-3 minutes.
