

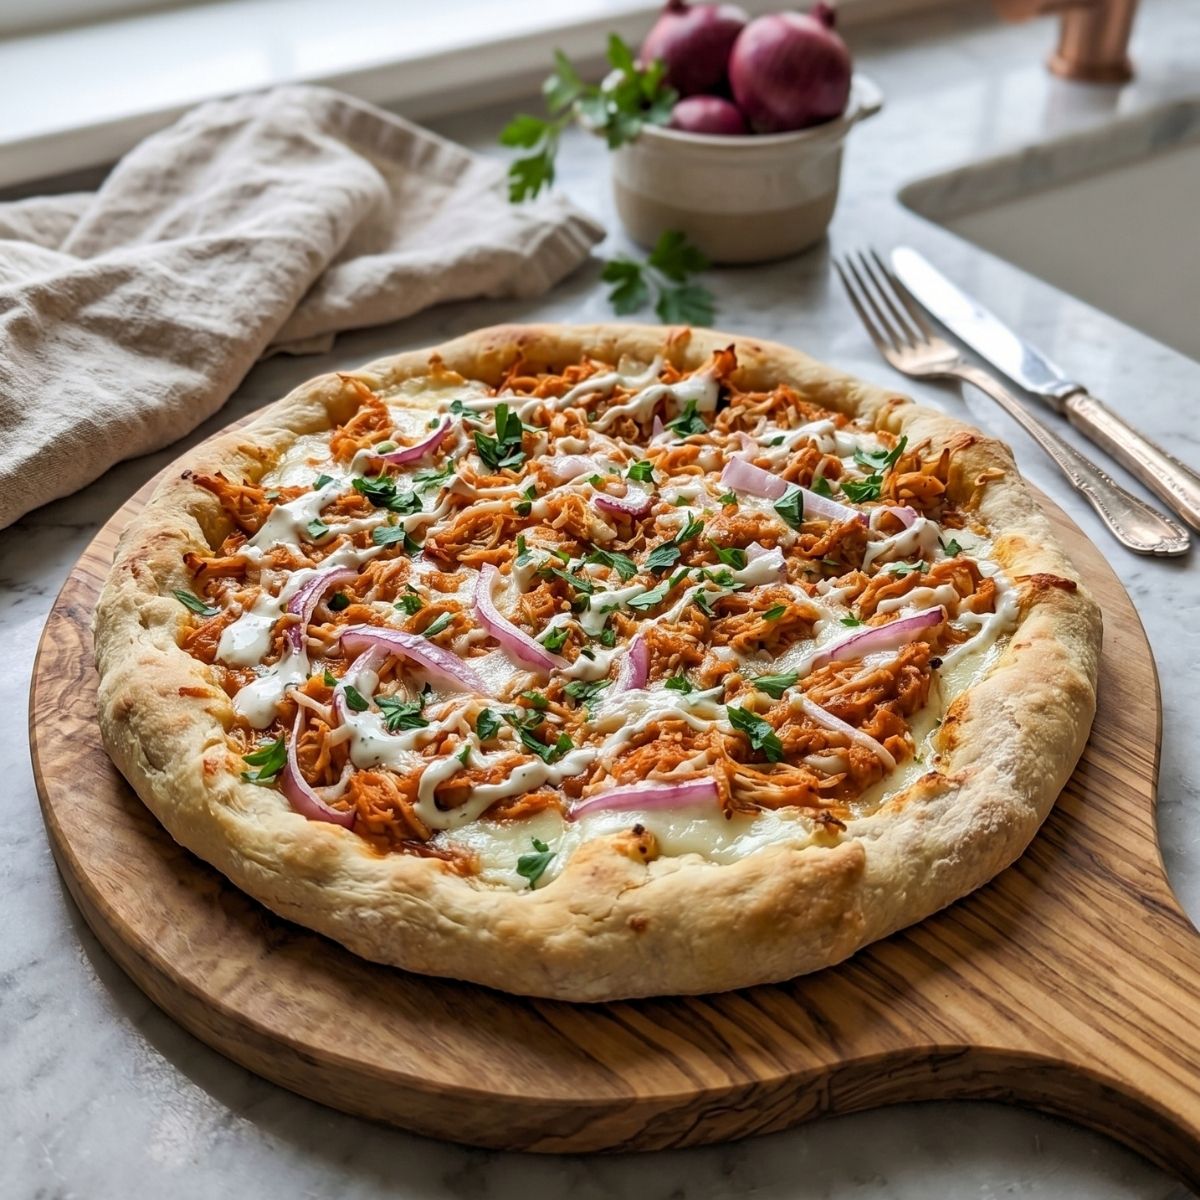
After more than 10 years of cooking from the same kitchen, I can tell you that pizza night used to feel like a project. Mixing dough, waiting for it to rise, flouring the counter, scrubbing it clean again — by the time the oven was hot, I was already half-tired. That changed the night I pulled together a greek yogurt bagels base on a whim and realized the same trick worked beautifully for pizza crust. No yeast. No rising. Just flour, yogurt, baking powder, and a handful of melty cheese baked right in. I now make this Greek yogurt pizza crust on the kind of evenings when I want a homemade dinner but don’t want to plan around dough. It comes together faster than delivery, the family devours it, and it slots right into our rotation alongside pizza bombs recipe when we’re craving something fun. Roll up your sleeves — I think you’re going to love how easy this one is.
You Might Also Love
If this Greek yogurt pizza crust wins you over, these are the recipes my family reaches for on the same kind of nights.
- Fluffy Greek Yogurt Bagels — soft, chewy bagels from the same magic two-ingredient dough base.
- Perfect Italian Pizza Dough Recipe Homemade — the classic yeasted dough for when you have a little more time.
- Pizza Bombs Recipe — pull-apart cheesy pockets that disappear before dinner is served.
- 2 Ingredient Cottage Cheese Flatbread — high-protein flatbread that doubles as a quick pizza base.
Why You’ll Love This Recipe?
- No yeast, no rising, no waiting. Baking powder does the lifting here, so you can mix the dough and slide it into the oven within minutes — no proofing window to plan around.
- High in protein, low on effort. Greek yogurt and melted mozzarella give this crust a tender chew with real staying power, which makes it a satisfying weeknight dinner that actually keeps the family full.
- Pantry-staple ingredients. Flour, baking powder, salt, yogurt, olive oil, and cheese — that’s it. I almost always have these on hand, which makes pizza night a last-minute possibility instead of a special event.
- Crisp edges, soft center. The mozzarella baked into the dough creates golden, slightly chewy edges that hold up to any topping you want to pile on.
- Endlessly adaptable. Swap the spices, switch to gluten-free flour, or load it up with whatever toppings you have — this crust is a reliable canvas for cleaning out the fridge.
Ingredient Notes
- All purpose flour — The structure of the crust. I use organic when I can, and gluten-free 1:1 blends work in its place.
- Baking powder — This is what makes the crust rise without yeast, so check that it is fresh and active.
- Fine sea salt — Brings out the flavor in both the dough and the toppings, so don’t skip it.
- Spices — I use oregano, red pepper flakes, onion powder, and garlic powder for that pizzeria-style aroma in every bite.
- Greek yogurt — Plain, nonfat works best — it adds tang, protein, and tender chew. Avoid flavored or sweetened varieties.
- Olive oil — A small amount keeps the dough supple and helps the edges crisp up golden in the oven.
- String cheese — Shredded mozzarella sticks melt right into the dough for a chewy, golden crust similar to the pizza bombs recipe base.
How to Make Greek Yogurt Pizza Crust?
- Preheat the oven. Heat your oven to 425°F and line a baking sheet with parchment paper for easy cleanup.
- Combine the dry ingredients. Whisk the flour, baking powder, salt, and spices together in a large mixing bowl until evenly blended.
- Tear the string cheese. Pull the mozzarella string cheese into small shreds and toss it into the dry mixture so it coats well.
- Add the wet ingredients. Spoon in the Greek yogurt and olive oil, then stir with a sturdy spoon until a shaggy dough forms.
- Knead the dough briefly. Turn the dough onto a lightly floured surface and knead for about one minute until smooth and pliable.
- Shape the crust. Pat or roll the dough into a roughly 10-inch round, about a quarter inch thick, on the lined baking sheet.
- Pre-bake the crust. Bake for 10 to 12 minutes until the surface looks dry and the edges turn lightly golden brown.
- Add your toppings. Spread sauce, sprinkle cheese, and layer on any toppings you love directly onto the par-baked crust.
- Finish baking. Return to the oven for 8 to 10 minutes until the cheese is melted, bubbly, and golden in spots.
- Slice and serve. Let the pizza rest two minutes, then slice into wedges and serve warm at the table.
Emily’s Expert Tips
- Don’t skip the par-bake. Pre-baking the crust for those first 10 to 12 minutes is what keeps the center from going soggy. Aunt Anne taught me this trick years ago and it has never let me down.
- Use a kitchen scale if you have one. Measuring 1 cup of flour can vary wildly by spoon and cup — aim for about 125 grams. Too much flour is the most common reason this crust turns out dry instead of tender.
- Drain extra liquid from the yogurt. If your Greek yogurt looks watery on top, give it a gentle stir or pour off the surface liquid before measuring. Excess moisture leads to sticky dough that needs more flour and loses its chew.
- Roll on parchment, not the counter. Rolling directly on parchment lets you transfer the crust to the pan without tearing or stretching it out of shape.
- Watch the edges, not the clock. Ovens vary, so pull the pizza when the cheese is bubbling and the edges are deep golden — color is more reliable than time alone.
Storage Tips
- Refrigerator — Wrap leftovers tightly and refrigerate for up to three days for best texture.
- Freezer — Freeze cooled, unsauced crusts on a tray, then bag for up to two months.
- Reheating — Warm slices in a 375°F oven for five minutes to restore crisp edges.
- Skip the microwave — It softens the crust and turns the cheese rubbery rather than gooey.
- Par-bake ahead — Pre-bake crusts in the morning, then top and finish baking at dinner.
Variations & Substitutions
- Gluten-free — Swap the all-purpose flour for a 1:1 gluten-free blend with xanthan gum included.
- Higher protein — Stir in a scoop of unflavored protein powder and use full-fat Greek yogurt for richness.
- Cottage cheese swap — Use blended cottage cheese in place of yogurt for a similar cottage cheese flatbread result.
- Whole wheat — Replace half the flour with white whole wheat for a nuttier, heartier crust.
- Dairy-free — Use thick coconut yogurt and vegan mozzarella shreds for a plant-based version.
- Personal pizzas — Divide the dough into 2 to 3 portions for kid-sized pizza bombs style rounds.

What to Serve With Greek Yogurt Pizza Crust?
- A crisp Caesar salad with shaved parmesan balances the warm, cheesy crust beautifully.
- Roasted broccoli with garlic and lemon adds a quick green side everyone eats.
- A simple arugula salad with olive oil and flaky salt cuts the richness.
- Garlic-herb dipping oil with crusty bread rounds out the meal for guests.
- Sparkling water with lemon or a chilled glass of pinot grigio pairs perfectly.
Frequently Asked Questions
- Can you make Greek yogurt pizza crust ahead of time? Yes — par-bake the crust, cool, wrap tightly, and refrigerate up to two days before topping.
- How long does Greek yogurt pizza crust last in the fridge? Up to three days in an airtight container or wrapped tightly in foil.
- Can you freeze Greek yogurt pizza crust? Yes — freeze par-baked, cooled crusts in a sealed bag for up to two months.
- Is Greek yogurt pizza crust gluten-free? Not as written. Swap the flour for a 1:1 gluten-free blend with xanthan gum.
- Why is my Greek yogurt pizza crust soggy? Likely too much yogurt moisture or skipping the par-bake step — drain yogurt and pre-bake fully.
- Can I use regular yogurt instead of Greek yogurt? No — regular yogurt is too thin. Greek yogurt’s thick texture is essential for proper dough.
Greek Yogurt Pizza Crust

A no-yeast, high-protein Greek yogurt pizza crust made with pantry staples — crisp, chewy edges and a tender center, ready in under 30 minutes. Perfect for stress-free weeknight pizza nights the whole family will love.
- Prep Time: 10 minutes
- Cook Time: 20 minutes
- Total Time: 30 minutes
- Yield: 4 servings
- Category: Bread & Baked
- Method: Baked
- Cuisine: American / Italian-American
- Diet: Vegetarian
Ingredients
- 1 cup all-purpose flour (organic preferred; use 1:1 gluten-free blend if needed)
- 1 tsp baking powder
- ½ tsp fine sea salt
- 2 tsp spices (½ tsp each oregano, red pepper flakes, onion powder, garlic powder)
- ½ cup Greek yogurt (plain, nonfat)
- ½ tsp olive oil (extra virgin)
- 2½ mozzarella string cheese sticks, torn into small shreds
Instructions
- Preheat your oven to 425°F (220°C) and line a baking sheet with parchment paper.
- In a large bowl, whisk together the flour, baking powder, salt, and spices until evenly blended.
- Tear the mozzarella string cheese into small shreds and toss into the dry mixture until well coated.
- Add the Greek yogurt and olive oil. Stir with a sturdy spoon until a shaggy dough forms.
- Turn the dough onto a lightly floured surface and knead for 30–60 seconds, just until smooth and pliable — do not overwork.
- Pat or roll the dough into a roughly 10-inch round, about ¼ inch thick, on the lined baking sheet.
- Pre-bake the crust for 10–12 minutes, until the surface looks dry and the edges are lightly golden.
- Remove from the oven and add a thin layer of sauce, cheese, and toppings in moderation directly onto the par-baked crust.
- Return to the oven and bake for 8–10 minutes, until the cheese is melted, bubbly, and golden in spots.
- Let the pizza rest 2 minutes, then slice into 4 wedges and serve warm.
Notes
- Don’t skip the par-bake — pre-baking the crust for the first 10–12 minutes is what keeps the center from going soggy.
- Measure flour by weight if possible — aim for about 125 g. Too much flour is the most common reason this crust turns out dry.
- If your Greek yogurt looks watery on top, stir or pour off the surface liquid before measuring to avoid sticky dough.
- For gluten-free, swap the all-purpose flour for a 1:1 gluten-free blend with xanthan gum included.
- Storage: refrigerate leftovers in an airtight container up to 3 days, or freeze cooled, par-baked, unsauced crusts up to 2 months. Reheat slices in a 375°F oven for 5 minutes to restore crisp edges.
